Compress an Image to 200KB Without Losing Quality

The upload box says “maximum 200KB”. Your image is 3.8 MB. You drag a compression slider somewhere to the left, save, check the file size, still too big, repeat. Ten minutes later your image is grainy and still 240KB.
There is a quicker way, and it starts with the step most people skip. Reduce the pixel count before you touch the compression level, and 200KB becomes an easy target for almost any image, without visible loss.
Why 200KB is the magic number
Portals set upload limits to keep their servers and page loads under control, and 200KB has become the common ceiling: job portals, visa and passport forms, school platforms, marketplace listings, membership databases, contact forms with attachments. Some portals go lower, often 100KB for an ID image, and a few allow 1 MB or 2 MB.
An image straight from a phone camera is 2 to 6 MB. That is 10 to 30 times over the 200KB limit, which is why a compression slider alone rarely gets you there without visible damage.
Resize first, compress second
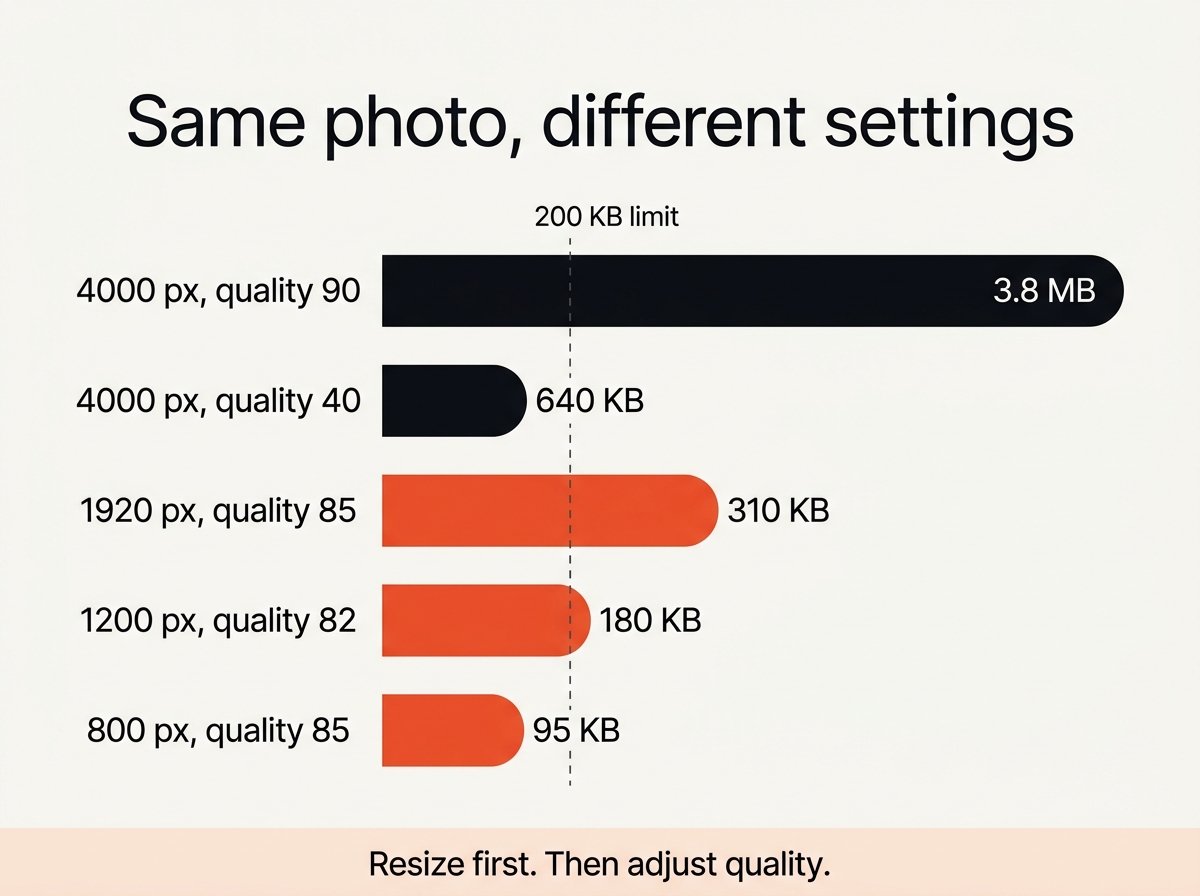
File size depends on two things: how many pixels the image has and how hard those pixels are compressed. A 12-megapixel camera image is 4000 by 3000 pixels. No upload form needs that, and no device shows it at full size.
Resize the longest side to 1920 pixels and you have cut the pixel count by three quarters before any image quality is lost. At 1200 pixels you are down to one tenth. Only after resizing does the JPEG compression level come into play, and now it can stay high.
The practical order:
- Resize to the longest side the use allows: 1920 for general uploads, 1200 for forms and listings, 800 for ID style photos.
- Compress as JPG at compression level 80 to 85 and check the file size.
- Lower the level in steps of 5 only if the file is still over 200KB.
- Strip metadata, because camera EXIF data and embedded thumbnails can add 50 to 100KB of their own.
The one-step way: set the target and let the tool search
Our free compress to size tool does the four steps above automatically. You type the target, it finds the best result that fits under it, and your images never leave your device.
- Upload your images into the tool, up to 20 at once. This is batch processing without an upload: the files stay in your browser.
- Enter the target file size, or click one of the presets: 100KB, 200KB, 500KB or 1 MB.
- Choose the longest side you allow. 1920 pixels is the default; pick 800 for passport style images.
- Pick JPG or WebP as the output format.
- Download the results, one by one or all of them as a ZIP.
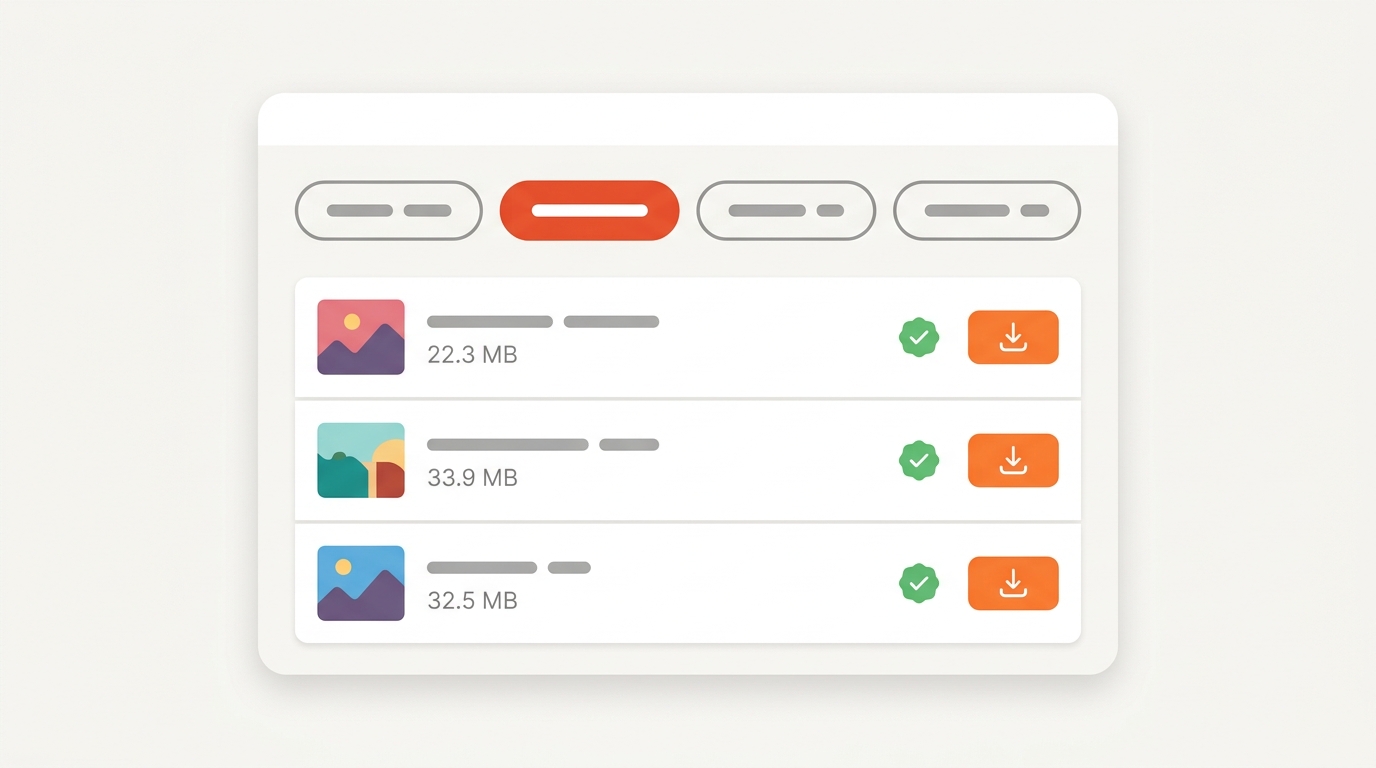
For every image the tool shows the final file size, the dimensions and the compression level it landed on. A green badge means the file is under your target. If even the lowest sensible level is too large, it reduces the dimensions step by step until the image fits, and tells you so.
Everything runs online in your browser, but the content never reaches a server. Your images are never uploaded anywhere, which matters when the image is the one going on your ID card.
Doing it by hand on your computer
Without a dedicated tool, every operating system can get you close.
Windows. Open the image in Photos, click the three-dot menu and choose Resize image. Pick a smaller image size or enter a custom width, set the level to around 80 and save. Check the file size in File Explorer.
Mac. Open the image in Preview, choose Tools, Adjust Size, set the width, then File, Export, select JPEG and move the slider while watching the file size estimate at the bottom. Preview is the quickest resizing tool a Mac has.
iPhone and Android. The share sheet in Mail offers Small, Medium and Large when you attach an image; Medium usually lands near 200KB. Google Photos and the Files app on Android offer similar image size choices.
Each of these involves a save, a check and probably a second attempt. Fine for one image, tedious for twenty, and none of them can batch process a folder.
Does compressing to 200KB lose quality?
Some, and how much depends almost entirely on the resolution you keep. A 1200-pixel JPG at level 80 looks crisp on any device and weighs roughly 150 to 250KB for a typical image. The same image at 4000 pixels forced under 200KB needs a compression level around 30 and looks blotchy.
Three kinds of content make it harder to hit the target without visual loss:
- Fine texture. Foliage, gravel, fabric and hair compress poorly. Expect to lower resolution further.
- Noise. Images taken in low light carry grain that JPEG treats as detail. A light noise reduction first helps a lot.
- Text and graphics. Screenshots and documents produce artifacts around letters at low compression levels. Keep the level above 85 and reduce pixels instead, or use PNG with fewer colors.
Images with smooth areas, portraits against plain backgrounds and product shots on white compress effortlessly, and you can push them under 100KB without anyone noticing.
JPG, PNG or WebP: which gets smallest?
For a photo, JPG or WebP. WebP produces files 25 to 35 percent smaller than JPG at the same visual quality, so an image that lands at 260KB as JPG often fits under 200KB as WebP with nothing else changed. The catch: not every platform accepts WebP, and government portals almost never do. Check the allowed formats before you choose.
PNG is the wrong format for a photo under a file size limit. It is lossless, so it cannot trade quality for size, and a photographic PNG is often five times larger than the same image as JPG. Use PNG only when the image is a graphic with flat colors or needs transparency. Our comparison of image formats goes through JPEG, PNG, WebP and AVIF in detail.
Compressing many images to 200KB at once
The browser tool handles 20 images at a time with one setting for all, which covers most batch jobs. For a few hundred files, the command line is quicker. With ImageMagick installed:
“`
magick mogrify -resize 1920×1920\> -quality 82 -strip *.jpg
“`
That resizes anything larger than 1920 pixels, sets the compression level to 82 and strips metadata, in place, for every JPG in the folder. For an exact 200KB target use the `-define jpeg:extent=200KB` option, which makes ImageMagick search for the level that fits. The process takes well under a second per image.
When the file is still too big
- Check the dimensions first. A 200KB limit with a 4000-pixel image is a resizing problem, not a compression problem.
- Remove metadata. Camera images carry EXIF data, GPS and a thumbnail. Removing them alone reduces file size by 50 to 100KB.
- Switch to WebP if the platform accepts it.
- Crop. Empty background costs kilobytes too. Crop to the subject before you compress your image.
- Convert graphics to PNG-8. Logos and diagrams with few colors get tiny in an indexed PNG and look sharper than any JPG.
Frequently asked questions
How do I compress a photo to under 100KB?
Set the longest side to 800 pixels and the target to 100KB. For an ID image at 413 by 531 pixels, the usual passport size, JPG at level 85 lands around 60 to 80KB.
What is the right size for a passport photo upload?
Most portals ask for 413 by 531 pixels or a 35 by 45 millimeter ratio, under 100KB or 200KB, as JPG. Check the exact numbers on the specific form, they differ by country.
Why is my image still 250KB after setting the level to 50?
Because the pixel dimensions are too large. The compression level controls how hard each pixel is compressed; it cannot compensate for ten times too many pixels. Resize your image first.
Does compressing to 200KB remove the EXIF data?
Our tool re-encodes the image, which drops camera EXIF data in the process. Desktop editors often keep it. If privacy matters, check the result with the free EXIF viewer.
Can I compress a PNG to 200KB?
Only by reducing dimensions or colors, since PNG has no compression level. For photos saved as PNG, convert to JPG instead and the problem usually disappears.
The short version
Resize to 1920 pixels or less, save as JPG at level 80 to 85, strip the metadata, and 200KB is rarely a problem. If you would rather not do the math, type the target into the tool, upload your images to nowhere but your own browser, and download.