How to Screenshot on Mac: Every Shortcut and Option
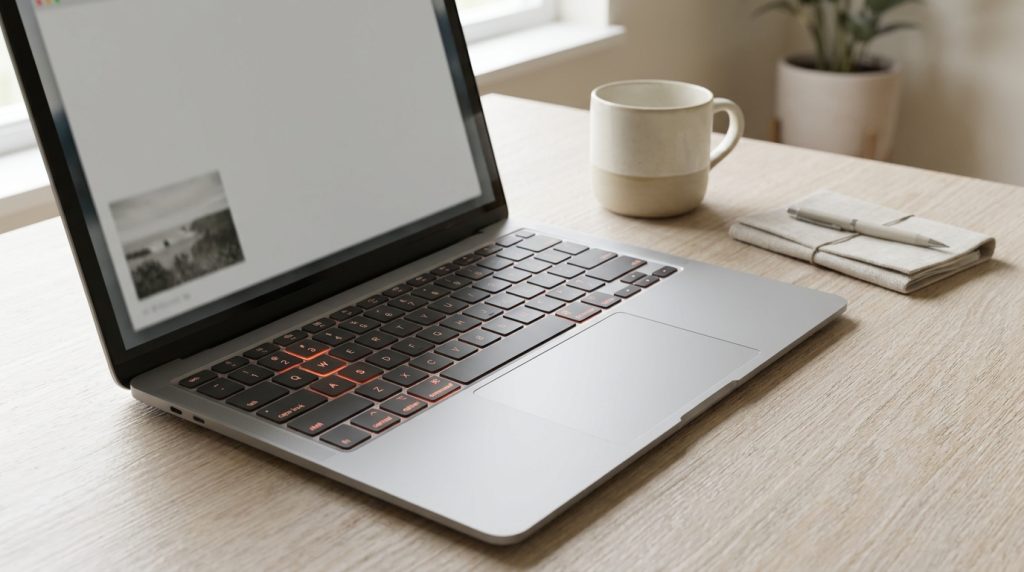
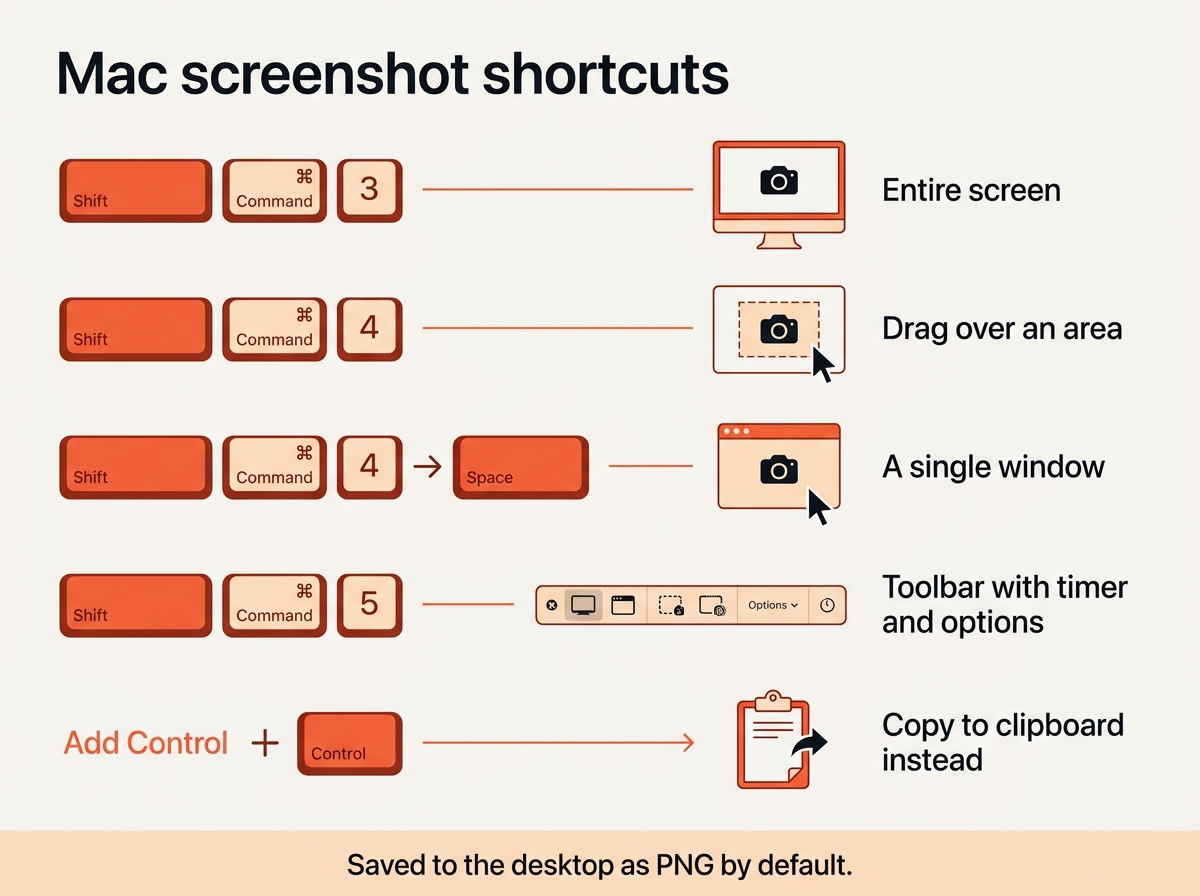
Every screenshot on a Mac starts with the same key combination: Shift-Command and a number. 3 captures your entire screen, 4 lets you select the area you want or a window, and 5 opens a toolbar with everything else. Here is what each of these shortcuts does, what to press and hold for the variations, and where to find your screenshot afterwards.
Shift-Command-3: capture the entire screen
Press and hold the keys together. Your screen flashes, you see a thumbnail in the corner of your screen, and a moment later the screenshot is saved to your desktop as a PNG file named with the date and time. With more than one display, each screen gets its own file.
Click the thumbnail before it disappears and you can edit your screenshot, crop it or delete it without opening another app. If you just want the file, do nothing; it saves on its own.
Shift-Command-4: capture part of the screen or a window
Press the keys and your pointer turns into a crosshair. Click and drag with your mouse or trackpad over the area you want, then release the mouse button or trackpad to take the screenshot. The area can be moved while you hold the Space bar, and just pressing Esc cancels.
While you drag you have extra control:
- Hold the Space bar to move the selection without changing its size.
- Hold the Shift key to resize in one direction only.
- Hold the Option key to resize from the center.
- Press Esc to cancel before you release.
To take a screenshot of a single window or menu, press the same keys, then tap the Space bar. The pointer changes to a camera icon; move it over the window you want and click. The capture includes the window’s shadow; hold the Option key while you click to leave that out.
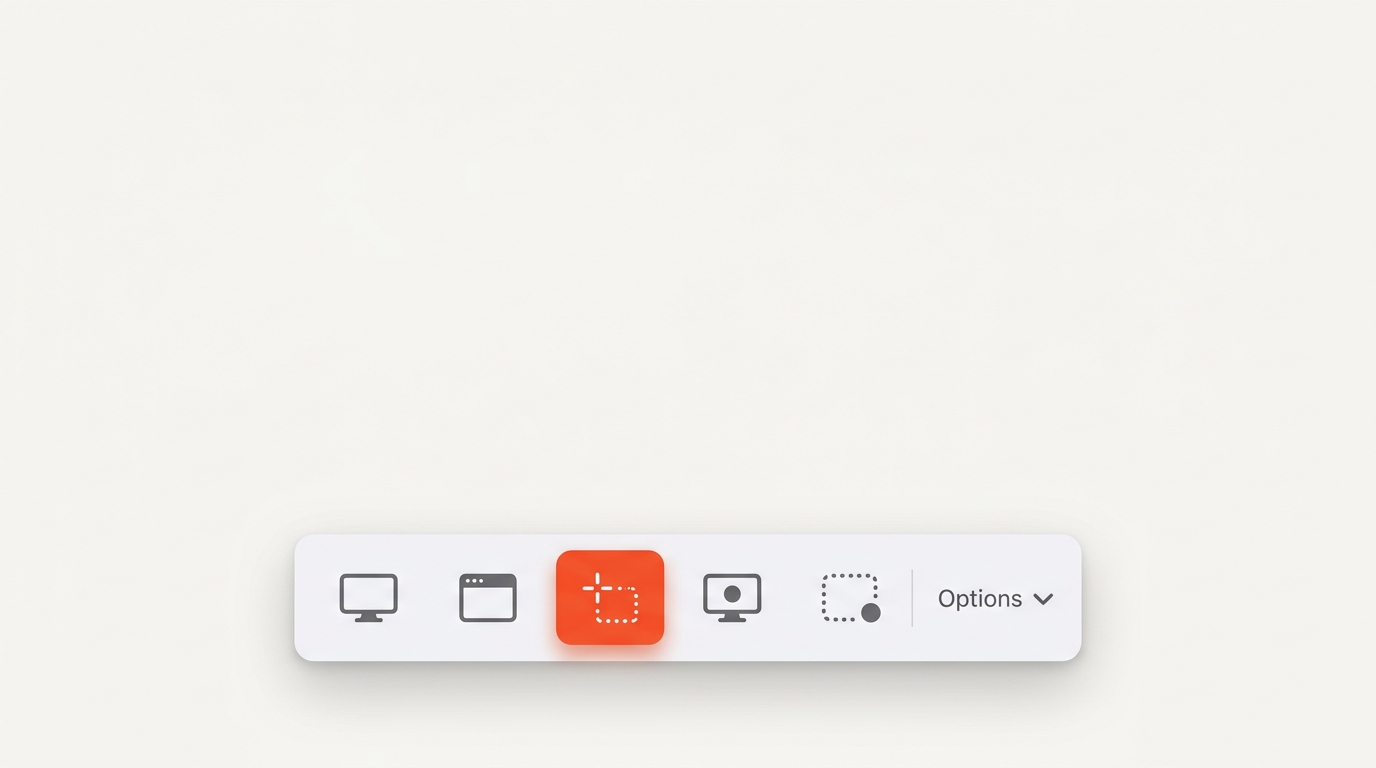
Shift-Command-5: the screenshot toolbar
Press the keys and a toolbar appears at the bottom of your screen. From left to right it offers capture of the entire screen, a window, a selected area, and two buttons to record video of your screen. The Options button is where the useful settings hide:
- Save to: Desktop, Documents, Clipboard, Mail, Messages, Preview, or any folder you select.
- Timer: none, 5 or 10 seconds, so you can open a menu before the capture.
- Show Floating Thumbnail: turn the preview in the corner on or off.
- Remember Last Selection: keep the same area for repeated screenshots.
- Show Mouse Pointer: include the cursor in the capture.
Apple documents all of this on its support page for screenshots on Mac.
Copy a screenshot to the clipboard instead
Add the Control key to any of these shortcuts and your screenshot goes to the clipboard rather than a file: Shift-Command-Control-3 for the whole screen, Shift-Command-Control-4 for an area. Paste it with Command-V into a document, a chat or an email. That is the quickest way to share a screenshot without a file landing on your desktop.
Where do you find your screenshots?
By default on your desktop, as PNG files named “Screenshot 2026-10-17 at 09.41.12”. To save your screenshots somewhere else, open the toolbar, click Options and pick a location under Save to. A dedicated Screenshots folder keeps the desktop clean, and you can change it again at any time.
To change the file format from PNG to JPG, you need a Terminal command:
defaults write com.apple.screencapture type jpgReplace jpg with png to change it back. For a one-off conversion, drop the PNG into our image converter instead.
Screenshot of the Touch Bar
On a MacBook Pro with a Touch Bar, Shift-Command-6 captures the Touch Bar itself. The result is a long, thin strip saved to your desktop like any other screenshot.
Scrolling screenshots on a Mac
macOS cannot capture a whole web page in one image. For web pages, use the browser: Firefox offers it in the right-click menu, Chrome in the developer tools, and Safari can export a page as PDF. The scrolling screenshot guide walks through each option.
When the screenshot keys do not work
- Another app owns the shortcut. Screenshot tools, Dropbox and some keyboard utilities take over the keys. Check their settings.
- The shortcut is disabled. Open System Settings, Keyboard, Keyboard Shortcuts, Screenshots and make sure that the entries are ticked.
- A protected app blocks capture. Some streaming and banking apps return a black image by design.
- The thumbnail gets in the way. Turn off Show Floating Thumbnail in the toolbar options if you keep capturing it, or just wait for it to slide away.
Frequently asked questions
How do you take a screenshot on a Mac?
Shift-Command-3 for the entire screen, Shift-Command-4 to select an area, and the same combination followed by the Space bar for a window.
How do I screenshot a single window without the shadow?
Shift-Command-4, press the Space bar, hold the Option key and click the window.
How do I take a timed screenshot?
Open the toolbar with Shift-Command-5, click Options, choose a 5 or 10 second timer, then click the Capture button.
Why are my screenshots so large?
Retina displays save at double resolution, so a full screen is often 4 to 6 MB as PNG. Compress or resize the file with the image compressor before you share it.
Can I edit a screenshot without another app?
Yes. Click the thumbnail you see in the corner right after taking it to open Markup, with pen, text, shapes and crop. Preview offers the same tools later, and you can take as many screenshots as you like before editing any of them.
How do I crop a screenshot on a Mac?
Click the thumbnail and use the crop tool, open the file in Preview and press Command-K after selecting an area, or use our image cropper in the browser.
The short version
Shift-Command-3 for everything on your screen, 4 for an area or a window, 5 for the toolbar with timer and save location, and the Control key added to any of them to copy instead of save. Screenshots land on your desktop as PNG unless you tell the toolbar otherwise. For the shortcuts on Windows, iPhone and Android, see the screenshot guide for every device.